K3PGP.Experimenter's.Corner
![]()
K3PGP.Experimenter's.Corner
![]()
Home Astronomy Bicycle Construction Laser Moonbounce Software Guest Misc Sales
Carrying
heavy items on a Bicycle
Please
note:
This article is NOT complete. More info and photos will added on
a time permitting basis.
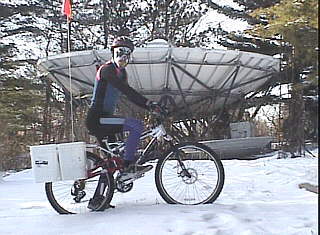 |
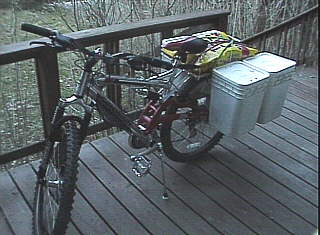
The modern bicycle has evolved into a finely tuned machine with multiple gears and comfort but it seems not much attention has been paid to carrying even the simplest of items. Most bikes these days don't even have fenders let alone any easy way to attach or carry anything. In this article I will show you how to build a simply framework over the rear wheel that will allow easy attachment of various items including plastic buckets for carrying heavy items. Fully loaded I have hauled as much as 105 pounds of groceries (up some STEEP hills I might add!) using this system so it is rugged and most important it's stable. The last thing you need is weight shifting around on a bicycle! Part of the secret is keeping the center of gravity low and over the rear wheel which by the way greatly improves traction and braking of the rear wheel but I must add that if you are going to carry this much weight on a bicycle MAKE SURE your brakes are in good operating condition. A front disc brake helps especially if you live in hilly terrain as I do. On my trip to and from the grocery store the elevation varies from 500 to 1500 feet. Unfortunately the steepest hills are on the RETURN trip! You will get used to hauling a load up hills but you don't want to think about going downhill carrying a load like this only to find out you have no brakes, so CHECK them first, check them last, and check them ALWAYS! And if you are doing this in winter when it's dry, remember to drink when you are thirsty, when you are not thirsty and in between as the air is dry and you will be loosing a LOT of moisture. You might want to check out my article, Keeping warm in winter. You will notice in the photo at left that I'm not wearing a lot of excess bulky clothing yet I am having no problem at all with the cold. It was around 20 degrees (F) when this photo was taken and has been below freezing for the past month while I have continued to make regular bicycle trips. |
All of this started one day when I was moving groceries from the cart to the truck and for some reason the anti-theft device tripped. You know the continual honk, honk, HONK until you can't stand it any longer! I fumbled around for my keys (I used the remote controlled RF device to unlock the door) and finally managed to get them in the ignition where I turned it on then immediately back off to reset the alarm.
After the last item was in the truck I pulled the cart away from the truck which allowed the door to slam shut. I didn't think anything of this at first. However, just as I turned to push the cart to the return station I heard a CLICK! I went back to the truck and sure enough it was what I thought it was. The anti-theft device had now resumed operation and had locked all the doors! So there I am looking in the window at the keys hanging in the ignition trying to open the door just to make sure it really was locked. It was and I ended up WALKING home that day. But on the way home I had plenty of time to think about something that had been in the back of my mind ever since the local grocery store moved in. Prior to this walking or riding a bicycle to the grocery store would have been out of the question due to the distance involved. However now I knew beyond any doubt that I was capable of walking home from the grocery store so I figured riding a bike should be even easier. The only problem was how to carry the groceries!
There are two ways to do this. (That I know of!) Either attach directly to the frame of the bike or build some kind of tow behind trailer. I am now experimenting with a homemade electric powered tow behind trailer. However, what you see here is a LOT simpler and is more than sufficient for hauling most loads. (Up to 100 pounds or maybe a bit over depending on the gearing of the bike, how steep the hills are and your ability to pedal.)
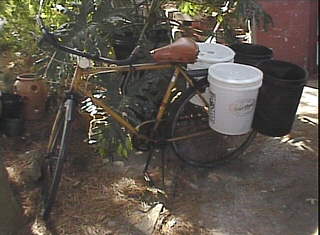 |
FIRST ATTEMPT WITH AN OLD JC PENNY THREE SPEED BIKE To the left you see my first attempt at hauling groceries on a VERY old three speed JC Penny bike that I forgot was stored in the shed out in back of the house. It worked fine but a three speed just wasn't up to the task of hauling much of anything (including me) up the steep hills that I had to climb. I usually ended up pushing this bike up the last 3/4 of every hill. I guess to put it more correctly it was me and not the bike that was not up to the task at hand but I don't think any amount of conditioning would allow any human being to power this thing up the side of a mountain with the buckets fully loaded. It weighed in at close to 75 pounds with the buckets EMPTY! I began looking for a new bike. However, I was more concerned about getting something with a heavy duty frame and low gearing than I was with total weight of the bike. A few extra pounds of bicycle isn't going to make much difference when there is 100 pounds of extra weight strapped to the rear wheel and putting this much weight on a super light weight bicycle frame might damage it. So don't knock yourself out trying to find the lightest weight bike for hauling stuff unless of course you don't plan on hauling anything heavy! |
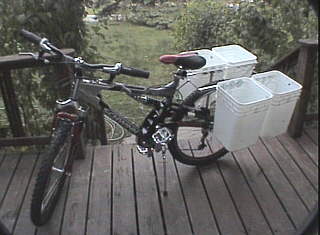 |
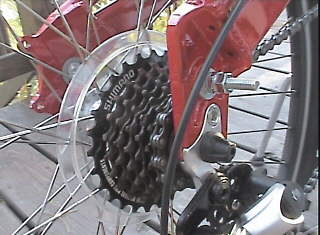
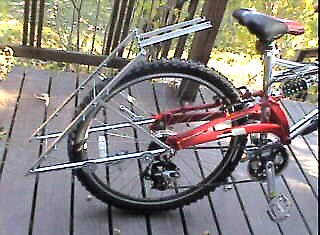
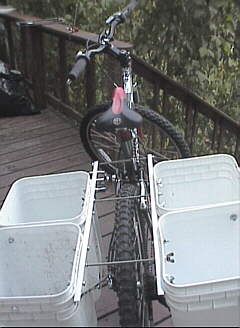
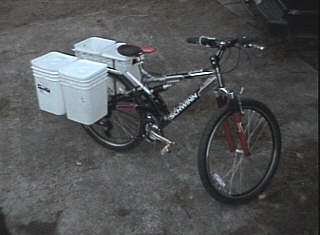
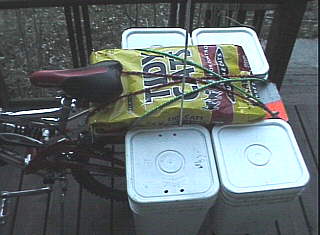
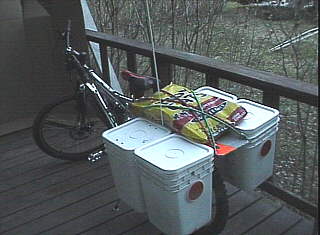
Shown here is what this project eventually evolved into. Although round buckets will also work the square buckets fit closer together with less wasted space. I have found three things that come in these buckets. Dry laundry soap, cat litter and eggs. Yes, EGGS, in bulk like what your local bakery uses. Check a couple of local bakeries. If not then perhaps it may be time to catch up on the laundry. Or freshen up the cat's litter box! :-^) Those of you paying close attention to the photos will notice there are two very similar bikes shown in the photos with the same rack and square buckets (Panniers ?) attached. That's because I exchanged this bike under warranty after having several problems with it. None of which were related to the extra load I was carrying. The bike I exchanged it for just happened to have a front disc brake and a slightly different color scheme (red). The disc brake proved to be a LOT more effective especially when going downhill fully loaded as it's not at all uncommon for me to hit speeds approaching 40 MPH. However, I alternately pulse the brakes while doing this and if I notice anything odd I will immediately reduce speed while I still can! On my second trip with this bike the rear brake failed completely while going down a steep hill fully loaded. This is why I am now extremely careful not only about brakes but EVERYTHING related to proper maintenance. I always carry tools with me and I was able to repair the brake on the road rather than have to rely on one brake for the rest of the trip! For some ideas on how to stop with NO brakes see Winter Cycling According to Pete |
WEIGHT
 |
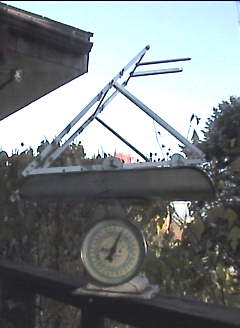 |
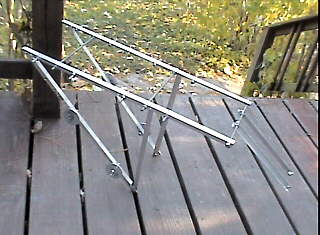
The completed rack weighs approx 1 3/4 pounds. Most of this weight is from the 1/4 x 20 steel screws, nuts, and all thread. I built the rack from stuff I had in the junkbox left over from other projects. The weight could be reduced by eliminating the steel parts. |
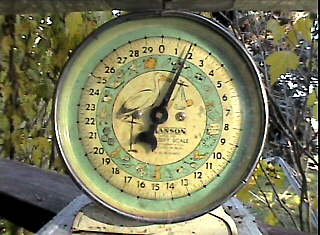 |
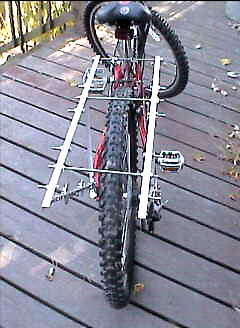
This rack is strongest at the front (right behind the seat post) and weakest at the rear, not to the point where there is any problem, but I am only pointing this out so you are aware of it and can make sure you don't run into a problem with improper loading of the rack.
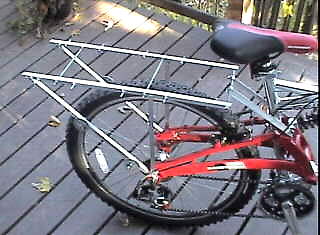
If you look at the middle photo above you will see the frame sitting on a scale. The top part of the frame in this photo is what attaches to the rear suspension spring right in front of the seat post. The arm coming from each side of the spring is short! Compare the length of these arms with those coming from near the rear axle. Obviously the shorter the arm the less it will flex. If you attach a heavy weight to the extreme rear of the rack (furthest from the seat post) what can happen is the rack may flex just enough to cause a weight shift. I found this out the hard way with the first rack that I built when coming down a hill at high speed and making a left hand turn without slowing down enough. I didn't become aware of the problem until after I made the turn and was heading straight ahead. Since all the weight was at the extreme back end of the bicycle and at the weakest point of the rack the weight caused the rack to flex to the right (as I'm sitting on the bike). Remember I had just made a left hand turn. But the weight in the back wanted to continue going straight ahead which is what caused the rack to bend to the right! I immediately tried to compensate for this with the steering which caused the rack and the weight to flex in the opposite direction. I now had a slow oscillation going on! The only cure was to reduce speed, QUICKLY before things got out of control. This is the same hill where I lost my rear brakes on my first bicycle! That is one of the reasons the new bike has a disc brake and why I check my brakes before I ride, while I'm ridng and after I'm done riding.
I have never had the oscillation problem with this rack as it is made out of heavier material (1/2 inch wide x 1/16 inch thick aluminum angle) and is well braced but I'm sure I could make this happen again if I placed enough weight at the extreme rear. You can test for this by holding the bike still while applying sideways force to the extreme rear of the rack that the buckets are attached to. You will ALWAYS have some sideways flexing. It's difficult to say how much is too much. It all depends on how much weight you intend to carry and whether or not you have properly distributed that weight! I doubt that you will have any problem with this rack but it's a good idea to always place the heaviest items in the bottom of the front buckets followed by the next heaviest, etc. until the front buckets are full. Then do the same with the rear buckets if you are using them. If I am not planning on hauling a lot of stuff I will only attach the front buckets and leave the rear buckets at home. I don't think I need to mention that you should also try to balance the weight left and right and pack everything tight enough so it won't shift around, especially the heavy items!
ATTACHING THE RACK TO THE BIKE
|
|||
|
-
|
|||
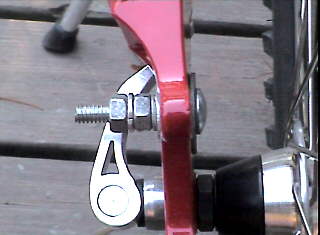
The rack is shown here
being attached to the bike. Standard 1/4 x 20 steel
hardware is used. |
THE BUCKETS
 |
Although I built my rack from stuff I had in
the junk box left over from other projects, you should be
able to get everything you need at your local hardware
store. The buckets are attached to the frame using 1/4 x
20 wing nuts and lock washers which makes them easy to
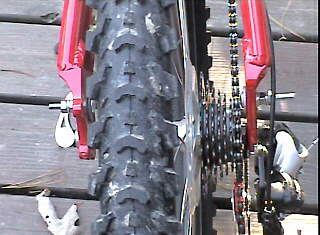
get off an on. Remember to use lock washers! For small loads I only attach the FRONT two buckets. ALWAYS keep the load as low and as far to the front of the bike as possible. Low to keep the center of gravity low and forward on the rack as the rack is more stable up front as there is less leverage from where the rack is attached to the bike. It would be possible to mount the buckets even lower on the frame if provisions are made to clear the rear derailleur. I didn't want to do this as I was trying to keep the width of the bike reasonable. As it is it still fits through a door with no problem. You also don't want to be taking up an excessive amount of space on the road as someone might not move over far enough to pass you! One of those 6 foot fiberglass poles with an orange flag mounted on the LEFT side of the left bucket is a VERY good idea so passing cars know just how wide your bike is! I attached mine directly to the frame as this gave more support. Also, make sure you mount the front buckets back far enough so the heels of your feet don't hit anything while pedaling! There is enough room to move the front buckets back a bit further if needed but keep in mind the further back you go the less stable things may become. I've occasionally had the tips of my shoes hit the front wheel when making turns and the rear of my shoes hit the front buckets so everything just barely fits in my case. Size 12 shoes don't help this situation but if I can make them work I'm sure anything smaller won't be any problem. In my case it's a good reminder that my foot isn't exactly where it should be! |
 |
25 POUNDS OF CAT LITTER
 |
 |
 |
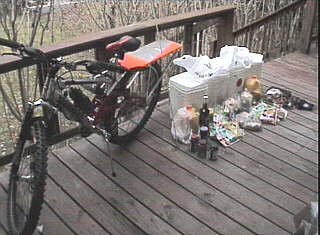
This is something I never thought I'd be able to haul on a bicycle! Before I started doing this I thought hauling something like this would be out of the question due to weight but since I've had as much as 105 pounds of groceries packed in the 4 buckets I knew form experience that weight would not be an issue. But supporting the bag would be, otherwise the bag might tear and start leaking. The only thing I noticed about carrying this much weight on top of the buckets instead of inside the buckets is the center of gravity is higher. (Unless of course the bucket are full of additional items!) This makes balancing the bike slightly more difficult. I noticed a very slight delay between balance corrections done with the steering and when the correction would take effect. This produced a very slight wobble effect especially at slow speed climbing hills. No big deal but I never noticed this when carrying this much or more weight lower on the bike (nearer to the rear axle). Although the full suspension system adds some weight to this bike it has proved to be a blessing when hauling heavy or delicate loads. Of course I could just open the bag of cat litter and dump it into two buckets on opposite sides (to balance the load) but then I'd have to wash all the dust out of the buckets! However in this case the buckets were full of groceries. See below!
I wasn't able to center the bag on the rack due to the fiberglass flag pole. I compensated for this by putting a few extra heavy items in the buckets on the opposite side of the bike.
Typical load
 |
 |
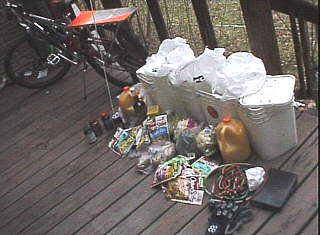 |
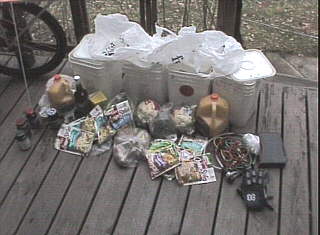
This is what was under the bag of cat litter! There are some heavy items like two gallons of orange juice (bicycle fuel!), a quart of grape juice (Also bicycle fuel as I found out by experiment that the bicycle runs better on a special blend of fuel!), half dozen potatoes, two heads of cauliflower, two heads of broccoli, and on and on. Plus of course my usual bicycle tools (used more than once along the side of the road!) and some other items that always go along for the ride.
THE HILLS
 |
 |
 |
 |
 |
 |
 |
 |
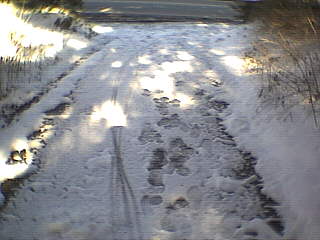 |
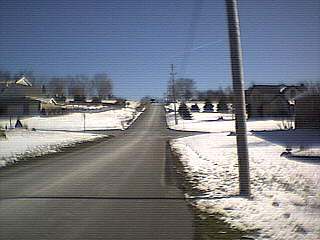
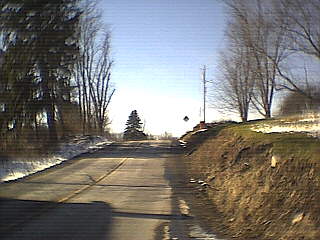
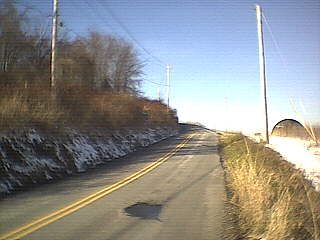
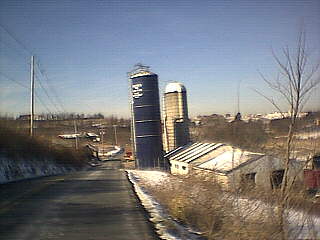
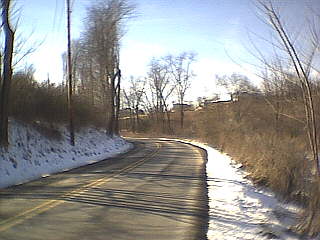
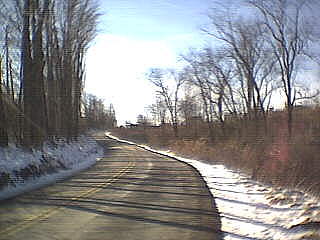
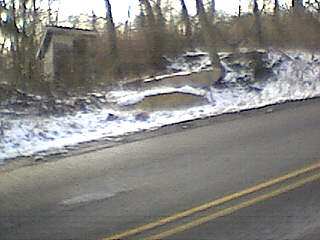
Some of the hills on the way to and from the grocery store. Unfortunately there are more and steeper hills on the return trip (when the bike is fully loaded)! Of course at the top of every hill is a breath taking view! The last shot is of my driveway. No car tracks! Only foot tracks and bicycle tracks.... And as you can tell by these photos, there isn't a lot of traffic on these roads which is the primary reason I take this route! Note the '-black ice-' in the middle photo which covered the width of the road a few days ago but has slowly been shrinking as the ice evaporates. Bad news especially for a fully loaded bicycle! There was an interesting tire track (ONE!) leading up to the spot of ice then off the side of the road and down over the hill. Not sure what caused this? All the above photos were taken within 1 hour of 12 noon yet the shadows are very long because the sun doesn't get very high in the sky this time of year.
 |
 |
When you get to the top of
this hill |
 Looking left from bend |
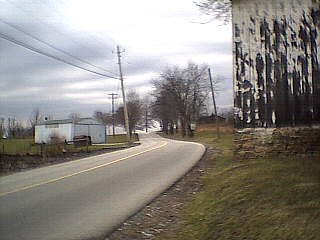 Looking right from bend |
The rest of the hill after
the slight left turn Lower Left: Looking down the
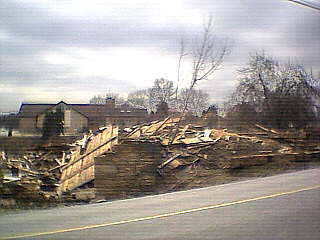
same hill Upper left photo shows an old
barn that has |
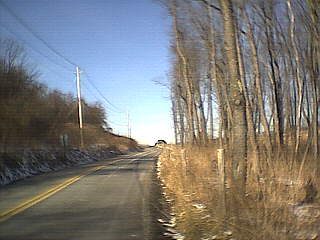
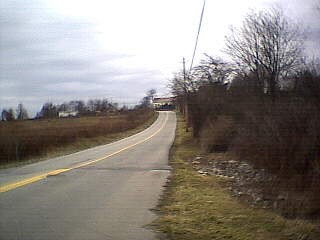
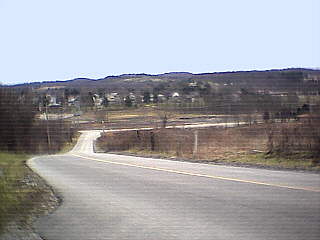
The grocery store is at the bottom of this hill (lower left photo) meaning I have to climb this hill on the return trip with the bike fully loaded! When I first started doing this I couldn't pedal myself up this hill but after about three months I was able to haul as much as 105 pounds up this hill non-stop! Of course that is in addition to the weight of the bike plus me!
The same telephone pole visible in the upper right hand photo is just visible in the lower left photo on the left hand side of the road but it doesn't look as tall. That's because the road is so steep you can't see the bottom of the pole! From the telephone pole to where this photo is taken from can be challenging only to be followed by what you see in the lower right photo! And yes it gets steeper yet at the very top after the second bend to the left.
 |
Another nice thing about this route is there are roadside '-facilities-' should you need them :-^) Yes, just in case you can't make it out that is indeed an OUTHOUSE! You do know what that is, right? Last time I went to use one of these things right after I sat down is when I noticed something moving. It was a snake slithering along the ground coming over to greet me! Although it's said the best thing to do in a circumstance like that is remain still, I had no intention of doing so and made a hasty retreat! I don't remember if I went or not but I did feel relieved. Mostly to be outside the box. Once again... The photos taken along the route from the bike are from a very early version Aiptek PenCam which is why the resolution isn't as good as the other photos. The other photos were taken by a MINI-DV camcorder and captured via firewire interface from moving video. |
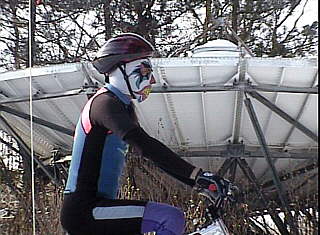
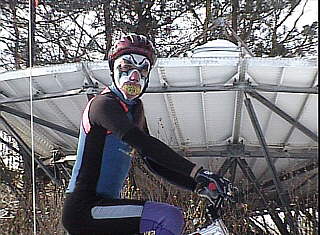
SOME CLOWN ON A BICYCLE
|
And yes. Next time someone tells you they saw '-SOME CLOWN-' riding a bicycle in WINTER hauling groceries up the side of a mountain they are telling the truth as that clown just might have been ME! The face mask is great at blocking wind blast as I normally hit speeds approaching 40 MPH if the roads are clear and dry. The mask can be turned inside out so that it's all black if going to a '-formal-' event. :-^) Much to my surprise I had more difficulty with cold air hitting me in the back of the neck just below where the helmet ends. I'm not sure why but perhaps it has something to do with how air flows over the helmet. The face mask also protects this area and is the main reason I wear it. The health benefits of doing this are incredible! Not only do I feel better but I've even noticed things like improved eyesight! Plus I'm not burning any gas. The truck has sat for three months at a time with no use and is actually starting to become a problem as letting a vehicle sit like that is not good for it. Sitting around is not good for you either so get a bicycle and start pedaling! And don't use age for an excuse. |
 |
Home Astronomy Bicycle Construction Laser Moonbounce Software Guest Misc Sales
Contents of this website are ©1997 - 2014 of K3PGP and of the originating authors.